
Add Video To WordPress Sites Using Oculu
Add Video To WordPress Sites Using Oculu
In this tutorial, We will cover inserting a Oculu video title into WordPress page or post.
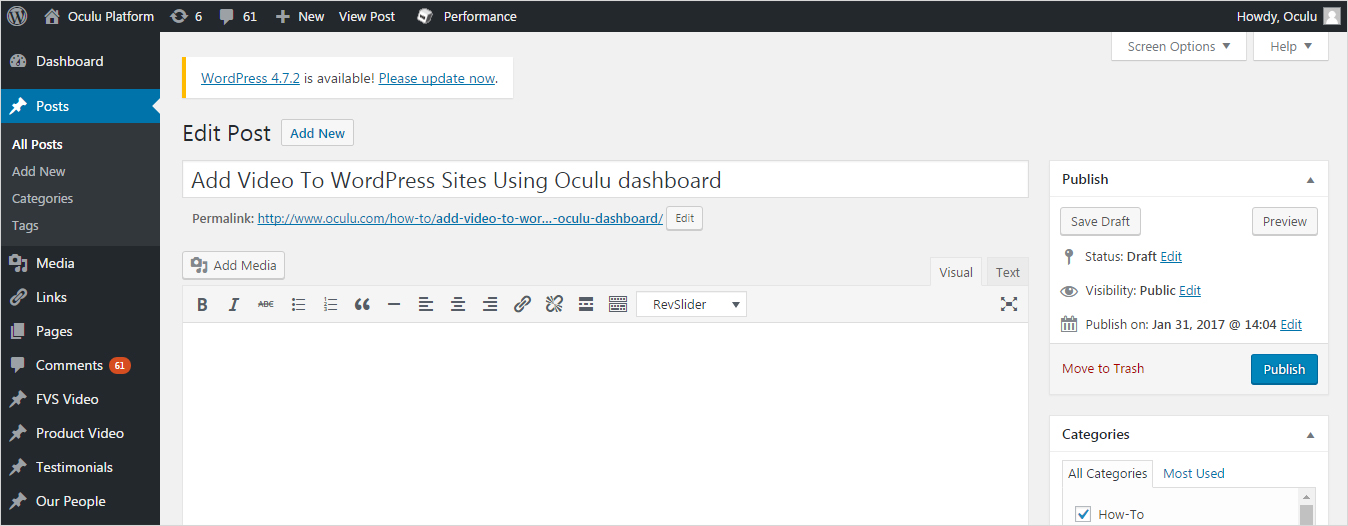
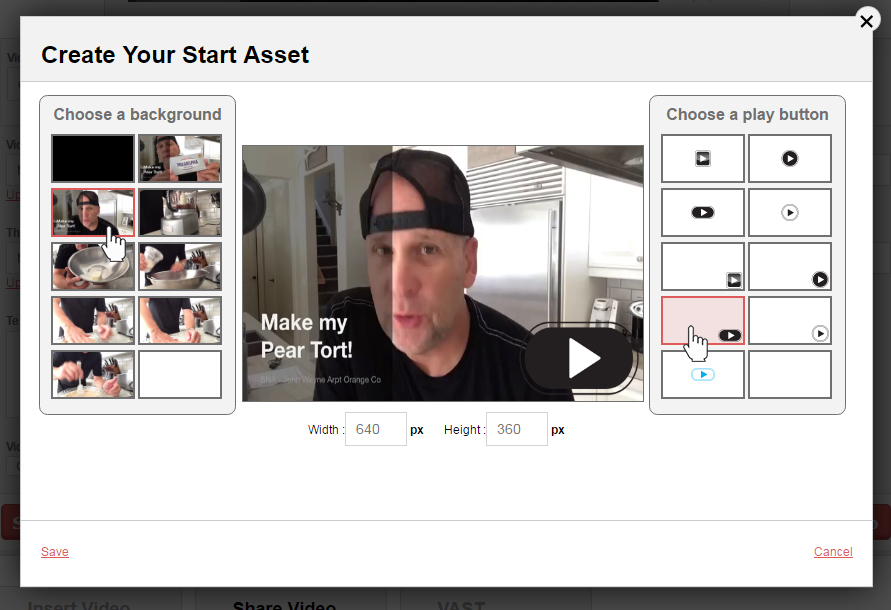
First, I like to login my WordPress account and i am going to create a new post. Opening a second tab in a browser and i am going to login into the Oculu dashboard and go to the video dashboard, choose the desire video title, then go to “Start Asset” Select, “Create Your Own.” Choose desire frames and click “save”.
Add New Post on the WordPress

New Post
Video Dashboard

Choose the Video Title

Video Start Asset

Create Your Start Asset
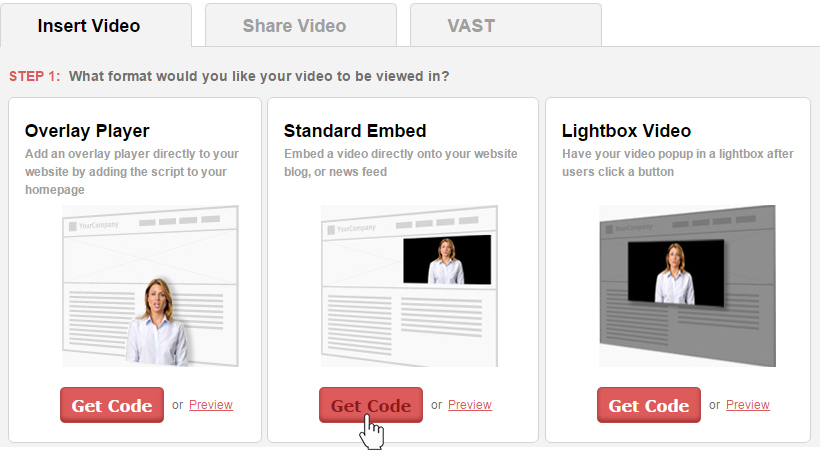
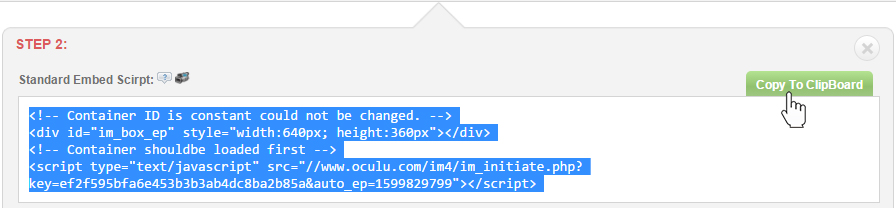
Then, Scroll down to insert video and choose the desire type of video format. For example you choose standard embed, click on get the code button, copy the load script, insert it into your WordPress page or post.
Choose the Desire Video Format
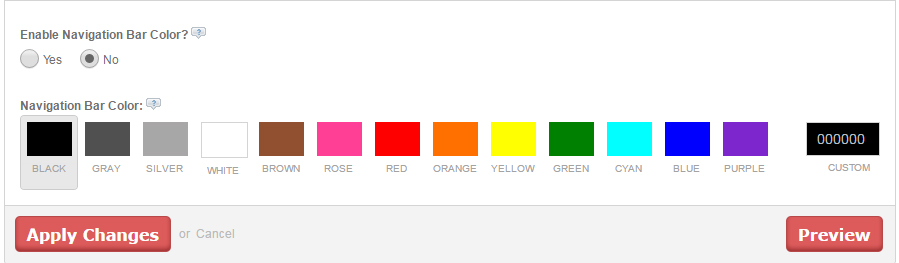
We gave client a privileged to customize the look and feel of their playlist with several options. Now once everything is set hit apply changes button.
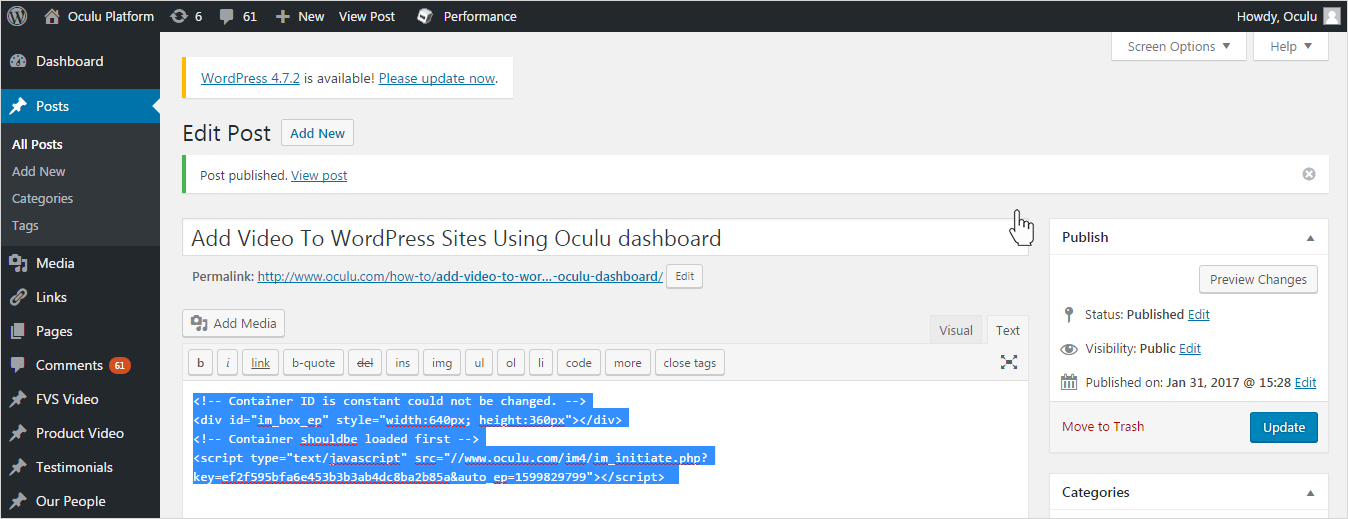
Copy the Standard Embed script and go to your WordPress page or post and paste in the “Text Tab”. Here is the example of the code. Paste it on the WordPress page or post like this only.
Don’t let adding videos to your website overwhelm you; it’s actually pretty easy. The following instructions will be for those of you using WordPress to host your website and Oculu as a video platform.
We hope this information get’s you accustomed to posting videos on your WordPress site using Oculu.
Those are the first steps to get Oculu to deliver your video ad campaigns. If you have any questions or ways to improve this tutorial, please contact us at support@oculu.com